
Choosing and Exporting a Review Region
A review region defines the area of your scene that Shale will capture. It determines where capture nodes are placed — each node is a position a reviewer can jump to and look around from.
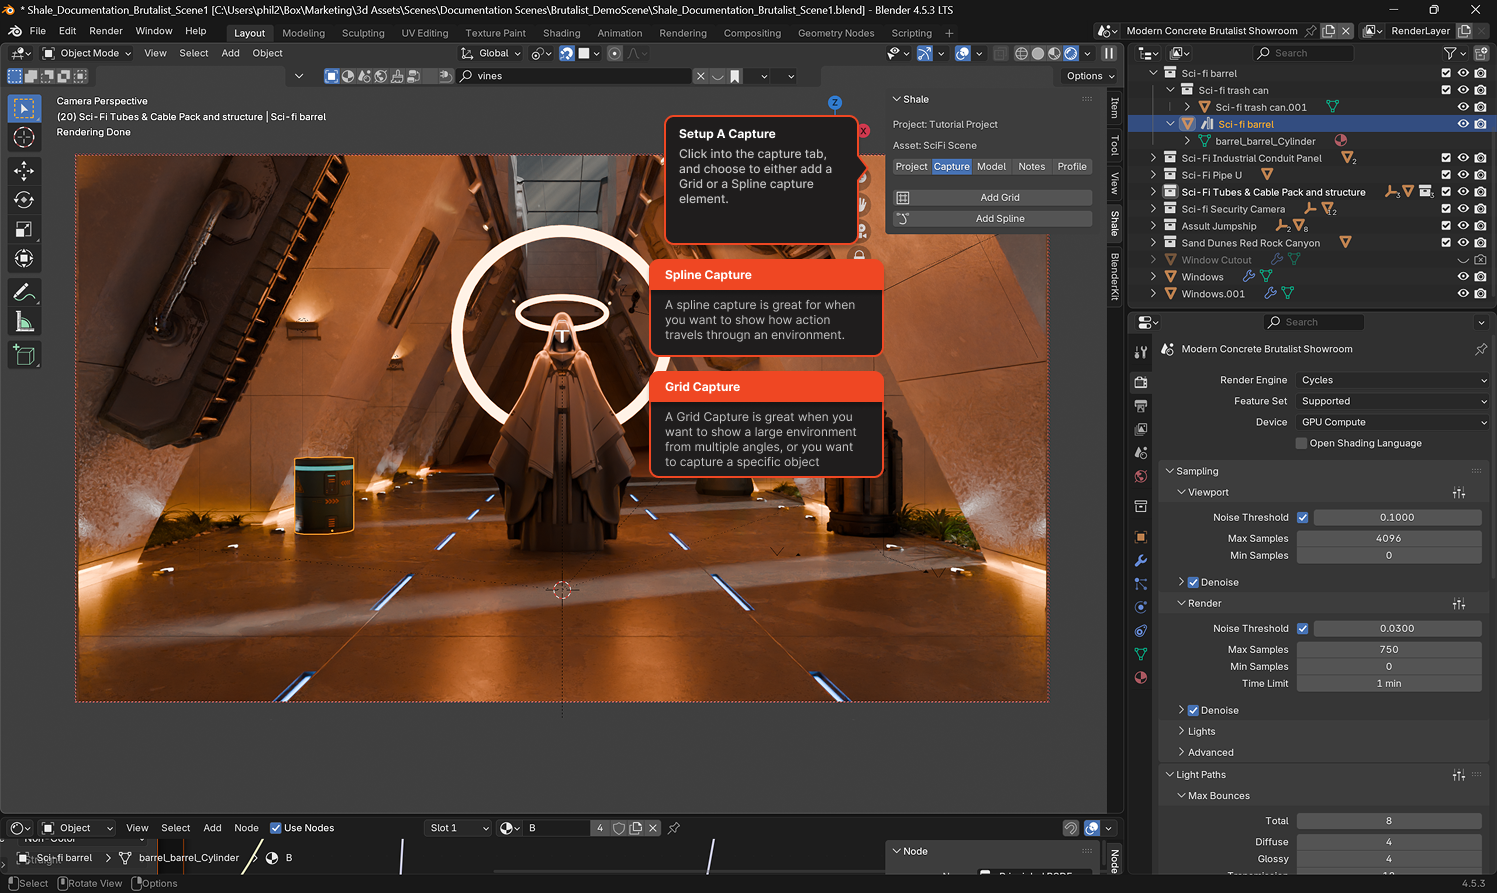
Shale offers two tools for defining a capture region. Go to the Capture tab and click Add Grid or Add Spline to place one in your scene.
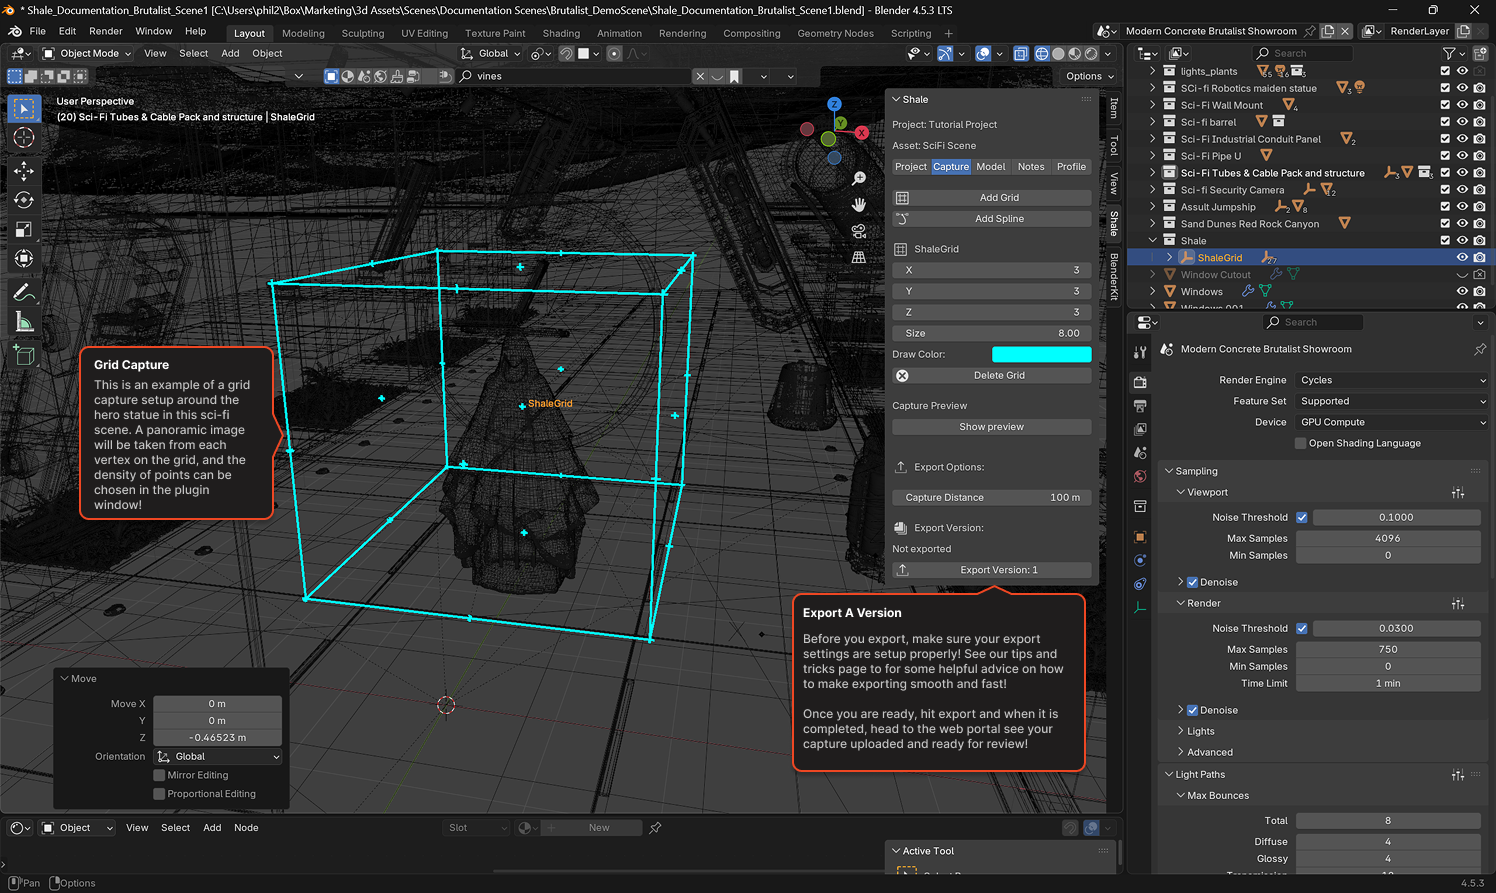
The Shale Grid places capture nodes in a 3D volumetric cage over your scene. When you export, Shale captures a 360° view at each node and assembles them into a navigable environment.
Good for open spaces or rooms where reviewers should be able to stand anywhere within the area.
Adding a Grid — click Add Grid in the Capture tab. A cyan wireframe cage (labelled ShaleGrid) will appear in your viewport. Move, rotate, and scale it like any other Blender object to position it over the area you want captured.
Grid Settings — with the ShaleGrid selected, the Capture tab shows:
| Setting | Description |
|---|---|
| X / Y / Z | Number of capture nodes along each axis. A 3×3×3 grid places 27 nodes across the volume. |
| Size | The physical size of the grid in metres. |
| Draw Color | The display colour of the cage in the viewport — doesn’t affect the capture. |
| Capture Distance | How far from each node the scene is rendered. Default is 100m. |
Preview — click Show Preview under Capture Preview to see a preview of what will be captured from the current node positions before committing to a full export.
Spline
Section titled “Spline”The ShaleSpline places capture nodes along a curve through your scene.
Good for corridors, walkways, or any space where you want to guide the reviewer along a specific route rather than covering a full volume. Like the Grid, the Spline is fully 3D — control points can be at different heights, making it suitable for staircases, ramps, or multi-level paths.
Adding a Spline — click Add Spline in the Capture tab. A spline object will appear in your viewport. Edit its control points in Edit Mode to route the path through your scene — capture nodes are placed at the vertices of the spline.
Exporting
Section titled “Exporting”Once your region is positioned, click Export Version in the Capture tab. Shale renders a 360° view at every node and uploads them to your linked asset in the Shale portal.